Equipment Setup for Conjunction Event

A number of folks were interested in the setup we used to do a live broadcast of the conjunction at Mount Wilson on Dec. 21st 2020. Here is a list of equipment and software that was used to put this together.
Live View at the 100-inch Dome
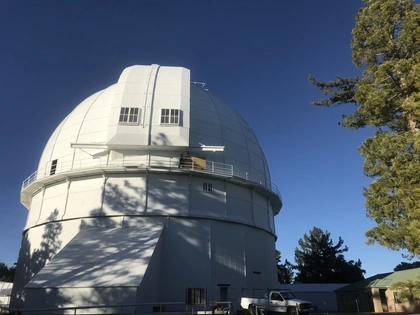
Because it was so low on the horizon (less than 20 degrees), the two "big" telescopes at Mount Wilson were unable to observe the conjunction. Instead we used a Celestron StarLight XLT 8" Schmidt Cassegrain telescope (C8) on a German Equitorial Mount (GEM), courtesy of Glendale Community College (GCC).
In order to get some elevation for maximum viewing time, we installed the Celestron on an extended portion of the catwalk that encircles the 100" Dome, which was rotated to face the direction of the setting planets. Normally, to accurately track objects, one needs to align the right-ascention axis of a GEM with Earth's axis of rotation, usually by aligning with the North Star, Polaris. This was not possible as we were setting up in daylight and the dome was in the way. Compases were also having problems with so much metal, so we eye-balled alignment relative to the 100-inch telescope inside the dome.
To do the live viewing, we used a ZWO ASI 183MC pro CMOS camera. This was purchased by GCC for doing live telescope viewing. This was mounted to the back of the optical tube of the C8 using a T-adapter. The CMOS camera can do many short exposures in rapid succession, so we get a close to live view of what is in the telescope's field of view. The ASI 183 has a relatively large pixel array and, with the C8 having a focal ratio of f/10 and aperture of 8 inches, gives roughly a 22X15 arc-minute field of view. Each pixel in the image is 0.22 arc-seconds, providing a good match to the typical seeing we get (1-3 arc-seconds).
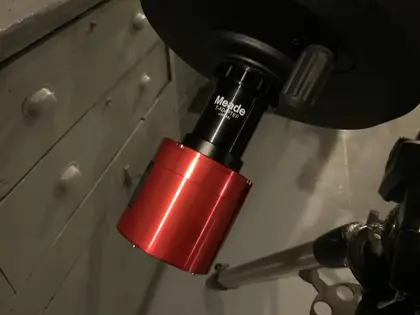
The ZWO camera comes with software that allows us to continuously update the view in real time, adjust the exposure and gain, and save images as they are read off the camera. The software works on both PC and Mac computers, which is convenient. We connected the ZWO to a laptop and shared the live view through Zoom.
Live View at the 60-inch Dome
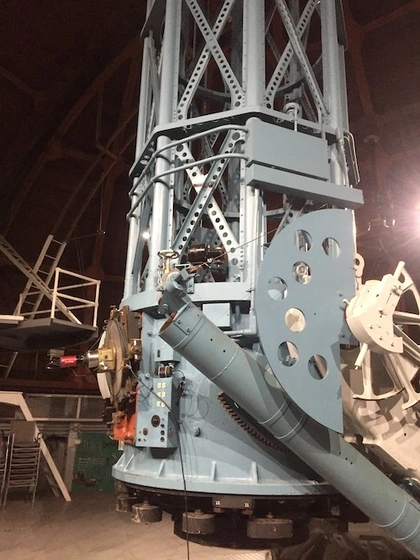
The 60-inch telescope was one of the first large optical reflecting telescope ever built and is locate at Mount Wilson Observatory (MWO).It has a focal ratio of approximately f/16 at the eyepiece. With a diameter of 60-inches, this makes for a very small field of view. For this reason, we not only employ a CMOS camera with a large sensor, but also a f/4 focal reducer. Still, this leaves us with a field of view of about 6X5 arc-minutes. And even with the larger size pixels, we end up with 0.08 arc-seconds per pixel. We can "bin" the sensor, reducing the effective resolution while gaining sensitivity.
The camera we used is an ATIK Horizon II. It is mounted on the side of the telescope where the eyepiece would usually go. Unlike the Celestron, the 60" does not have a hole in the primary mirror. At the base of the optical tube assembly, there is a solid 60" diameter convex mirror. This reflects the light to a secondary mirror at the top of the trellis. The light then travels down the tube to a 3rd mirror that is tilted 45 degrees and sends the light out the side. This is where we normally mount the eyepieces for regular viewing. The ATIK camera fits into the focuser and is connected to a PC running the ATIK control software.

Here is an image that shows the relative sizes of the fields of view of both the Celestron and 60-inch using the equipment we have described. While the 60-inch has a relatively small field of view, it has a good deal more light-gathering-power and also higher resolution. This makes it ideal for viewing small objects such as planets, globular clusters, and planetary nebulas. (generated using Astronomy Tools)
The Software
The event was live streamed using zoom webinar. The stream was also shared via YouTube live. However, we had multiple camera angles, video feeds, and audio sources. To handle all these different inputs, we used the free software OBS Studio from Open Broadcast Software. This allows you to set up different "scenes", combining video feeds, window shares, audio inputs, static images, etc. You can then switch back and forth from scene to scene. Best of all, OBS creates a "virtual webcam" that Zoom can connect to. So instead of switching back and forth from different video cameras and screen shares within zoom, you can just stick to the virtual camera and do all your scene changes within OBS.